A Gentle Introduction to Phoenix LiveView and Tailwind
Posted on March 14, 2022 • 14 minutes • 2876 words
LiveView is a new way of building dynamic web applications that combines the interactivity of Single Page Applications written in JavaScript with the security and simplicity of regular web applications. As setting it up can be confusing for newcomers, I wrote this step-by-step tutorial on how to set up the environment.
We will be writing a simple counter with LiveView, and will make it pretty with Tailwind.
The end result for this tutorial
The final version of this tutorial can be found at https://github.com/diegofreijo/phoenix_liveview_tutorial
Why Phoenix LiveView?
Let’s imagine how would the counter application be implemented with the existing ways of building web applications. Keep in mind that these examples are oversimplifications so I’m hiding a lot of details. Still they are perfect to introduce you to their topics!
Regular HTTP requests
This is how the web began working in the 1970s and was the only way until the late 1990s. With this approach, when the browser wants new information from the server, it would perform an HTTP request. The server would respond with a complete HTML document representing the new page:
<a>Count: 0</a>...
</html>... Browser -->> Browser: User clicks on the + button Browser ->> Server: Give me the page 'http://www.site.com/counter?action=increment' Server -->> Browser: Ok Note over Browser, Server: <html>...
<a>Count: 1</a>...
</html>...
😃 The good: It’s a very simple but effective way to build sites. Static sites are built this way, and several dynamic applications still are made this way.
🤬 The bad: to show only a small change to the user, the server needs to transfer a full new page to the browser. This makes each request take a non-trivial amount of time. So the interaction does not feel “instant” like a desktop application would.
AJAX and SPA
In the 1990s JavaScript arrived in the browsers to add some simple interactivity to the applications like a visual effect or an alert popup. Around the 2000s people realized that you could also perform HTTP requests from JavaScript itself. So you could request just a simple piece of information, receive it in an easy-to-parse format like XML and update the value on the DOM. All of this without having to perform a full-page request. This technique was known as AJAX for Asynchronous JavaScript And XML.
Now we need to add the server-side logic for the counter on an API endpoint. This API will be called by the JavaScript received on the first request.
<script>// Code to interact with the counter</script>...
</html>... Browser ->> Server: Give me the value for 'http://www.site.com/api/initial' Server -->> Browser: Ok Note over Browser, Server: <count>0</count> Browser -->> Browser: User clicks on the + button Browser ->> Server: Give me the value for 'http://www.site.com/api/increment' Server -->> Browser: Ok Note over Browser, Server: <count>1</count>
People then realized that XML is a verbose format, as the node names have to be opened and closed. So the responses were way bigger than they had to be. As a result, JSON become popular.
In the 2010s people realized that you could actually build your whole site like this. So the navigation between pages was also done by JavaScript. These sites are called SPA for Single Page Application.
😃 The good: The more logic you write in JavaScript, the snappier the interaction for the user. All the server interactions are made in the background and the user barely notices it. Complex applications you usually use like Gmail are made like this.
🤬 The bad: You now have to write two applications. The backend, which is the server code, and the frontend which is the JavaScript one. Probably each one is written in a different language and framework. You also need to define a clear interface for each side to communicate effectively. All of this gives you a lot of complexity which translates to longer development cycles.
LiveView
And now we are approaching the late 2010’s and the Phoenix framework gave us a new alternative. This one sits in the middle of the last two. We’re now moving all the logic to the server, so we don’t have a frontend to build and maintain. But we still manage to keep good interactivity. It manages to do so by doing the following:
Define dynamic spots on the DOM
When you write an HTML template for LiveView, you are also defining what pieces of the DOM are going to change with any dynamic request sent by the browser. So, by default, you are writing what looks like a regular server-side rendered web page. While, in practice, you’re defining something closer to the AJAX or SPA model. So when a piece of information is changed by some request, the server would only send the new piece of info among some extra data that tips the browser on what parts of the DOM changed. The rest of the page is kept as it is.
This ends up producing lightweight requests and responses.
Websockets
Imagine the last example on the AJAX way. Just for incrementing a single value, the browser had to open a new TCP connection to the server and send several HTTP headers. The server had to respond with their own HTTP response headers, plus the XML or JSON tags that would help the browser understand the response, and finally the new value, the 1 that the browser finally updates on the DOM.
This overhead of bytes is needed because HTTP is a stateless protocol. It means that any request is independent of the rest that was sent before or after it. So for each one, the browser needs to present itself, ask what it wants, and say goodbye to the server. If you’re going to do that several times per minute, it is inefficient.
Instead, you could use WebSockets. They could be thought of as HTTP connections that don’t close after a single request. So the connection is kept open and both parties can send the other one whatever piece of information they want. I’m greatly oversimplifying them so if you are interested in them I recommend you to read more about them .
LiveView uses WebSockets, so every request has very little overhead. Most of the data sent and received to and from the server are shown to the user, instead of protocol metadata.
<script>// Code to create a websocket channel</script>...
</html>... Browser ->> Server: Let's create a WebSocket channel 'ws://www.site.com/counter' Server -->> Browser: Ok alt Websocket Browser -->> Server: 'initial' Server -->> Browser: 0 Browser -->> Server: 'increment' Server -->> Browser: 1 end
😃 The good: you now have only one application with just one language and framework. As everything runs on the server, you don’t have to spread some logic between the client and the server, like form validations. And the user still has a snap interaction with the page.
🤬 The bad: the interaction is not as good as a SPA though. There is still some information that needs to travel to and from the server. So it is not a good fit for applications with a complex user interface, games that need to draw to an HTML5 canvas, or sites that need to keep working even with no internet connection.
Installing Elixir
First, we need to install Elixir. There are several ways to do so. The one I ended up using the most is by a version manager called asdf . This program helps you define the exact version of Elixir and OTP (the Erlang virtual machine where it runs) you want to use per project. This becomes crucial once new versions of Elixir come out, but you need to keep using an old one or the project won’t compile anymore. It can also help you set the version you want for the whole machine, in case you are not working on a folder with a version set.
You can find the installation instructions at the official documentation . I used Homebrew , so I just needed to do:
brew install asdf
Once installed we add the Elixir plugin to it:
asdf plugin-add elixir https://github.com/asdf-vm/asdf-elixir.git
And install the currently latest version of Elixir (1.13.3) running on the latest Erlang (OTP 24). And mark it as the default version to use globally:
asdf install elixir 1.13.3-otp-24
asdf global elixir 1.13.3-otp-24
You can verify you have Elixir properly installed by running
elixir -v
Its output should be similar to
Erlang/OTP 24 [erts-12.2.1] [source] [64-bit] [smp:16:16] [ds:16:16:10] [async-threads:1] [jit] [dtrace]

Elixir 1.13.3 (compiled with Erlang/OTP 24)
You can also tell asdf that this project (the current directory and sub-directories) what version it needs. To do so, run
asdf local elixir 1.13.3-otp-24
It will create a file .tool-versions specifying the versions of the libraries you specified. This is helpful when you’re working on projects that require different versions of the same library.
The Phoenix project
Now we install the 1.6.6 version of Phoenix, which is the latest one at the moment of writing. For that we use mix. mix is the program that will help us interact with the installed Elixir runtime, crate projects, build them, distribute them, etc.
mix archive.install hex phx_new 1.6.6
It will as you if you want to install Hex. Say yes.
Now we can create our Phoenix application. Go into the parent folder where you want it located and run:
mix phx.new counter --live
counter is the name of the project we’ll be using. You can use whatever you want, but it will be easier for you to follow the tutorial if you keep this name. The --live flag instructs Phoenix to install the basics to support LiveView.
It will ask you to install the dependencies, go ahead and say yes.
Using a Postgres database with Docker
If you read the instructions on the screen after creating the project, you’ll see that it’s saying something about configuring a database. All default Phoenix applications assume you have a working database running. Until we provide a valid one, our project won’t run. For this simple example we are not persisting anything, so we could get away with it by telling Phoenix to not expect a database. But it is a good excuse to show you how to set it up so let’s go ahead and create a development instance.
The default database used by Phoenix applications is Postgres . You can download a local server and use it as your local development instance. Instead, I prefer to use Docker .
To put it in very simple terms, Docker allows you to create any service you need with just a code configuration. In reality, is more than that, but I don’t want this to become a Docker tutorial. Feel free to go to the official site if you want to learn more.
Go ahead and download
Docker Desktop
. Afterward, go to the project root and create the file docker-compose.yml with:
version: "3.8"

services:
  database:
    image: postgres:13.1-alpine
    environment:
        POSTGRES_USER: postgres
        POSTGRES_PASSWORD: postgres
    ports:
      - 5432:5432
And to start the database server run:
docker-compose up -d
Now we can tell Elixir to create the database with:
mix ecto.create
If it asks you to install rebar3, say yes.
And finally, run the application with
mix phx.server
Now open your favorite browser and go to http://localhost:4000. You should see the default Phoenix application running!
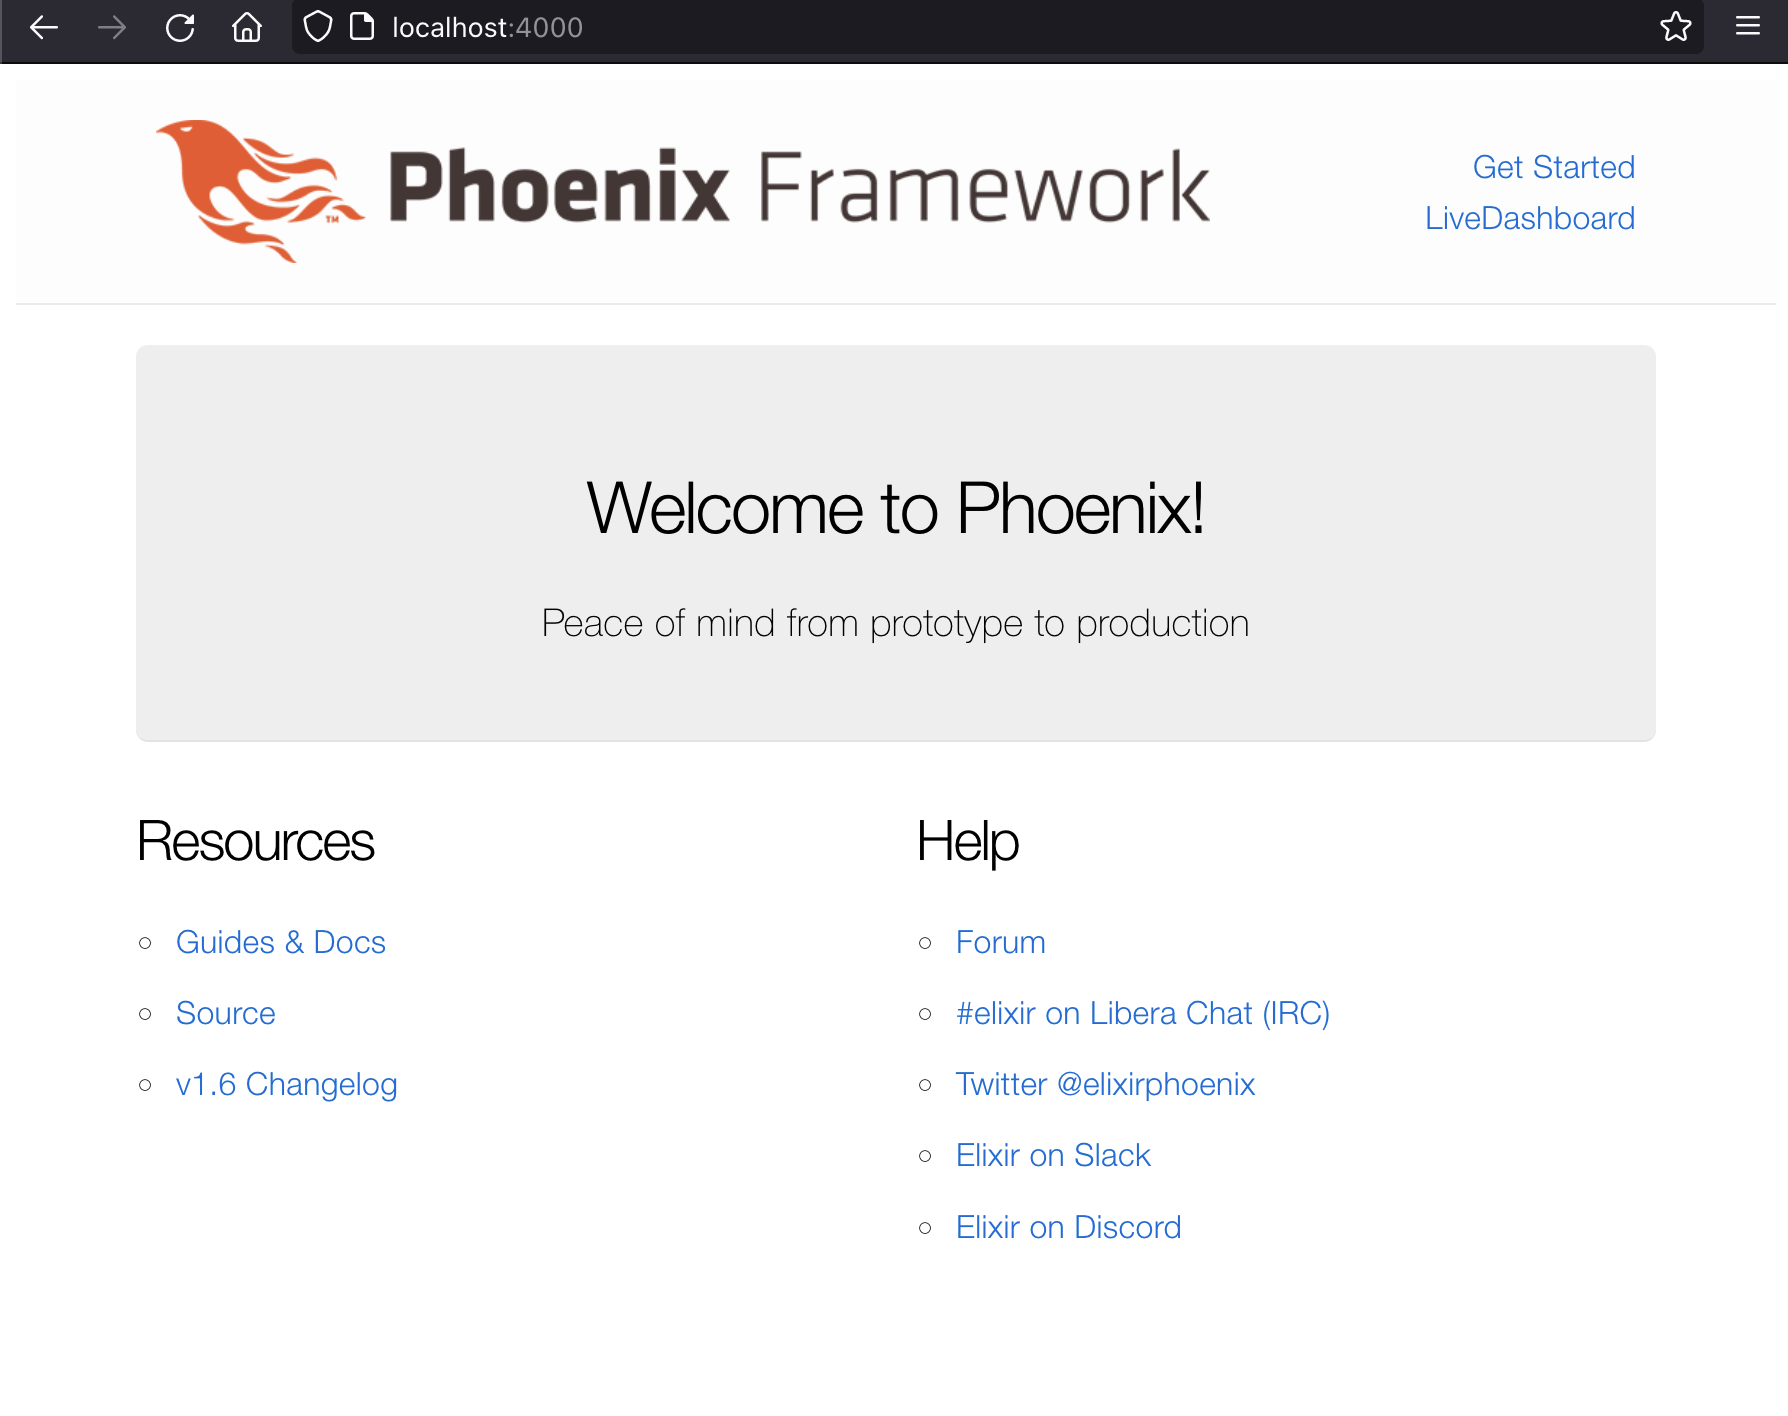
The default phoenix application
Tailwind
The last thing we need to set up is Tailwind . It is a CSS framework, which means it will help us make the site look good.
The official instructions on how to add it to a Phoenix project are pretty good. Some steps are not needed here, so the short version is:
On mix.exs add the new dependency:
defp deps do
  [
    # ...
    {:tailwind, "~> 0.1", runtime: Mix.env() == :dev}
  ]
end
And modify the deployment task:
defp aliases do
  [
    # ...
    "assets.deploy": ["tailwind default --minify", "esbuild default --minify", "phx.digest"]
  ]
]
Add the new watcher to dev.exs:
watchers: [
  # ...
  tailwind: {Tailwind, :install_and_run, [:default, ~w(--watch)]}
]
And finally instruct Elixir to install the new dependency and run the Tailwind installer:
mix deps.get
mix tailwind.install
To confirm that it works, we’ll edit the welcome page to show something with Tailwind. Open lib/counter_web/templates/page/index.html.heex and replace all its contents with
<h1 class="font-thin hover:font-bold">Hello Tailwind!</h1>
If you still have your server running, close it by pressing ctrl-c twice. Then start it again with:
mix phx.server
You should now see a simpler initial page. The Hello Tailwind! message should change to bold when you hover your mouse over it:
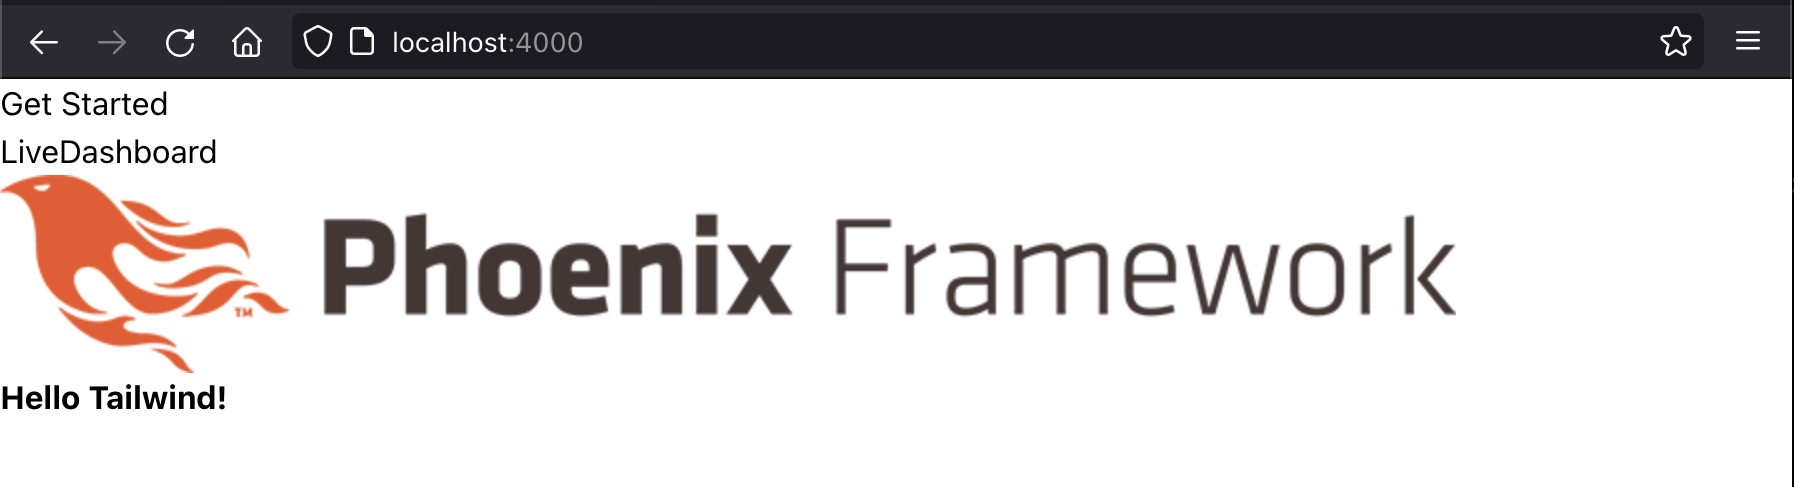
Tailwind is now working
Congratulations! You now have everything set up to begin building an awesome web application. In case something is not working as expected on your end, you can grab my repository up to this point on this tag: https://github.com/diegofreijo/phoenix_liveview_tutorial/releases/tag/setup_complete
Implementing the counter with LiveView
Now let’s do something interesting with our stack! First, let’s remove the default Phoenix header. Open lib/counter_web/templates/layout/root.html.heex and replace its contents with
<!DOCTYPE html>
<html lang="en">
  <head>
    <meta charset="utf-8"/>
    <meta http-equiv="X-UA-Compatible" content="IE=edge"/>
    <meta name="viewport" content="width=device-width, initial-scale=1.0"/>
    <%= csrf_meta_tag() %>
    <%= live_title_tag assigns[:page_title] || "Counter", suffix: " · Phoenix Framework" %>
    <link phx-track-static rel="stylesheet" href={Routes.static_path(@conn, "/assets/app.css")}/>
    <script defer phx-track-static type="text/javascript" src={Routes.static_path(@conn, "/assets/app.js")}></script>
  </head>
  <body>
    <%= @inner_content %>
  </body>
</html>
We will build a simple counter to test the LiveView interactivity. For that, we need to add a live view module.
Create the file lib/counter_web/live/counter_live.ex. We begin adding the module declaration and the mount function. It gets called when the live view loads, so is a good place to add initialization logic. Here we set the initial value of the count to 0:
defmodule CounterWeb.CounterLive do
  use CounterWeb, :live_view

  @impl true
  def mount(_params, _session, socket) do
    # When the view loads we set the initial count to 0
    socket = assign(socket, count: 0)
    {:ok, socket}
  end
  #...
And now we handle the events that the view is going to fire. In our case we need two: one to increase the counter and one to decrease it. So we add two instances of handle_event. Add the following to the same file:
  # ...
  @impl true
  def handle_event("increase", _, socket) do
    # Add 1 to the current count
    socket = assign(socket, count: socket.assigns.count + 1)
    {:noreply, socket}
  end

  @impl true
  def handle_event("decrease", _, socket) do
    # Substract 1 to the current count
    socket = assign(socket, count: socket.assigns.count - 1)
    {:noreply, socket}
  end
end
We need to render this live view. Create a file counter_live.html.heex in the same directory as counter_live.ex and add the following:
<h1>LiveView counter!</h1>

<a href="#" phx-click="increase">+</a>
<a href="#" phx-click="decrease">-</a>

<a><%= @count %></a>
Notice how we add the live events we defined before on the phx-click attributes of the a tags, working as buttons.
Before we test this out we need to instruct Phoenix when it should show our new view. We need a new live route. Open lib/counter_web/router.ex and modify the main scope to add it:
scope "/", CounterWeb do
  pipe_through :browser

  # New route
  live "/counter", CounterLive

  get "/", PageController, :index
end
Now start again the server if it isn’t running. Go to http://localhost:4000/counter and you should see the counter working with all its glory!

The counter works!
Notice how quickly the interaction works, it feels like a JavaScript application. But all the logic is running server-side.
Make it pretty with Tailwind
Our little counter works, but is ugly. The buttons are small and we can barely realize they are interactive. My designing skills are pretty limited so I prefer to steal get inspired by the work of others with better skills than me. I found
this example
that implements a nice counter in Tailwind.
Open again counter_live.html.heex and replace it with:
<h1 class="text-2xl">LiveView counter!</h1>

<div class="h-10 w-32">
  <div class="flex flex-row h-10 w-full rounded-lg relative bg-transparent mt-1">
    <button phx-click="decrease" class="bg-gray-300 text-gray-600 hover:text-gray-700 hover:bg-gray-400 h-full w-20 rounded-l cursor-pointer outline-none">
      <span class="m-auto text-2xl font-thin">−</span>
    </button>
    <input value={@count} class="outline-none text-center w-full bg-gray-300 font-semibold text-md hover:text-black focus:text-black md:text-basecursor-default flex items-center text-gray-700" name="custom-input-number" />
    <button phx-click="increase" class="bg-gray-300 text-gray-600 hover:text-gray-700 hover:bg-gray-400 h-full w-20 rounded-r cursor-pointer">
        <span class="m-auto text-2xl font-thin">+</span>
    </button>
  </div>
</div>
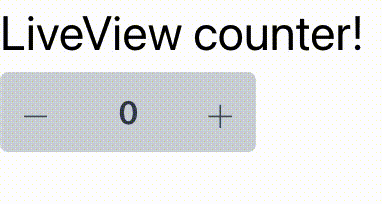
Now the counter looks way better! And still works as before:
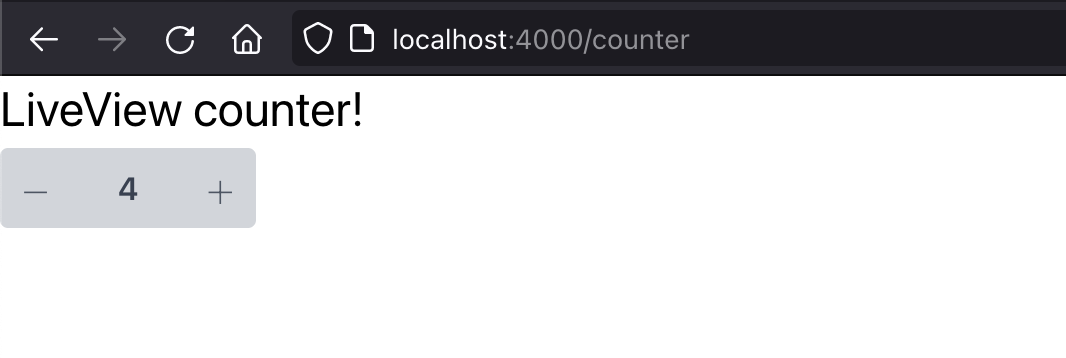
The counter works and looks good
Next steps
This simple example shows you how to add interactive views. But we did not touch on other important aspects of a web application like database storage, user sessions, testing, deployment, etc. If you are interested to learn more about this feel free to send me an email to or a DM on Twitter and share with me what should I write about in my next post. And subscribe to the email list so you don’t miss it!
And, again, feel free to check the final version on GitHub